
← Back to Build Guides
Home Server for Beginners: Complete 2026 Guide
Complete beginner's guide to building a home server in 2026. Hardware options from $0 (old laptop) to $200 (N100 mini PC), Ubuntu Server installation, Docker setup, and your first services — Pi-hole, Vaultwarden, Jellyfin.
Published Mar 6, 2026Updated Mar 6, 2026
beginnersgetting-startedlow-powerpiholeself-hostedubuntu
Home Server for Beginners: Complete 2026 Guide
A home server is a computer that runs 24/7 on your local network, hosting services you'd otherwise pay monthly subscriptions for — or services that simply don't exist as cloud products. Ad blocking for your whole home. A private photo backup that actually respects your data. Media streaming without content libraries disappearing overnight.
This guide takes you from zero to a running home server in a weekend, without requiring a computer science degree.
What Is a Home Server, Actually?

A home server is just a PC that:
- Stays on all the time (or wakes up on demand)
- Runs software that provides services to other devices on your network
- Stores your files, media, or data locally — not on someone else's computer
"Server" sounds intimidating, but you're not running enterprise infrastructure. A basic home server can be a $60 used mini PC or even an old laptop. The "server" part is just software.
What Can You Do With a Home Server?

Save Money
| Cloud Service | Monthly Cost | Self-Hosted Alternative | Hardware Cost |
|---|---|---|---|
| Google One 2TB | $10/month | Nextcloud | ~$0 (existing hardware) |
| Plex Pass | $5/month | Jellyfin (free) | ~$0 |
| 1Password Family | $5/month | Vaultwarden | ~$0 |
| LastPass | $3/month | Bitwarden/Vaultwarden | ~$0 |
| Spotify | $11/month | Navidrome + your music | ~$0 |
| Total | $34/month ($408/year) | Self-hosted | $60–$200 one-time |
Break-even: 2–6 months, then you're saving $408/year.
Gain Privacy
- No company scanning your photos for ad targeting
- No Terms of Service changes removing features you rely on
- No 2AM emails saying your cloud storage is discontinuing
Do Things Cloud Can't
- Stream your actual ripped DVD/Blu-ray collection without re-licensing fees
- Run a Minecraft server without $15–$25/month hosting fees
- Host your own AI (Ollama with local LLMs) without API costs
- Block ads across your entire network at the DNS level (Pi-hole)
Hardware: What You Actually Need
You don't need specialized server hardware. Any of these work:
Option 1: Used Mini PC ($50–$150) — Best Value
Dell Optiplex 3080 Micro ($55–$80 on eBay):
- Intel i5-10500T (6 cores, efficient T-series)
- Add 16GB RAM if not included ($20)
- Runs 8–12W idle — about $10/year in electricity
- Handles Plex/Jellyfin, Nextcloud, Pi-hole, Home Assistant simultaneously
Beelink EQ12 or similar N100 mini PC ($150–$180 new):
- Intel N100 (very efficient, modern)
- Usually comes with 16GB RAM + 500GB NVMe
- Runs 6–8W idle — about $7/year in electricity
- Better for always-on, lightweight services
Option 2: Old Laptop ($0 — Free)
If you have an old laptop gathering dust:
- Connect it via ethernet (or WiFi, though ethernet is better)
- Set it to "don't sleep" when lid is closed (Settings → Power)
- Install Ubuntu Server on it
- Works for basic services; battery acts as a built-in UPS
Downsides: Older laptops draw more power (15–35W), harder to upgrade storage.
Option 3: Raspberry Pi 5 ($60–$80)
- ARM-based, runs cool and quiet
- 4GB or 8GB models
- No hardware video transcoding — poor for Plex/Jellyfin 4K
- Great for Pi-hole, Home Assistant, Nextcloud, Vaultwarden
- Active community, tons of documentation
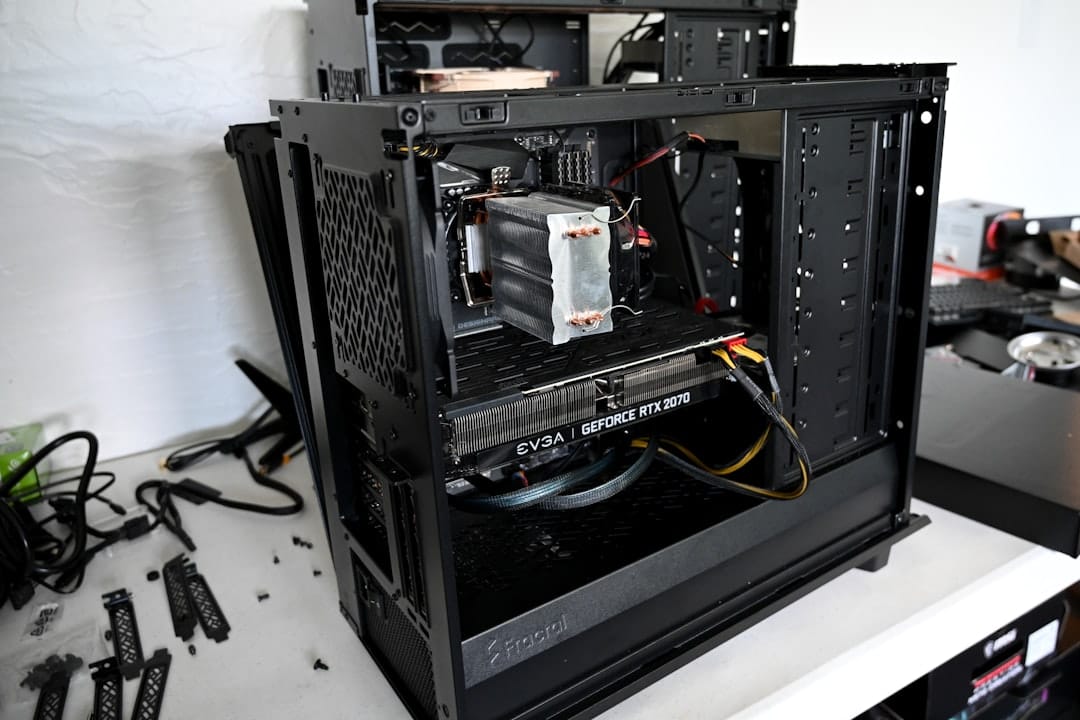
Option 4: Old Desktop PC ($0–$50)
An old desktop can work but typically draws 60–150W idle — $70–$180/year in electricity. Only worth it if you're doing heavy workloads (lots of VMs, Plex with 5+ streams) or if the hardware is free.
Storage: How Much Do You Need?
| Use Case | Storage Needed |
|---|---|
| Pi-hole, Uptime Kuma, lightweight apps | 32–64GB SSD |
| Nextcloud (personal files, 1 user) | 500GB–2TB |
| Jellyfin/Plex media library | 2–20TB+ |
| Immich (photo backup, 1 user) | 500GB–2TB |
| Full home server stack | 2TB+ recommended |
Budget storage strategy:
- NVMe SSD for OS + Docker containers (250GB–1TB)
- Large HDD for media and files (2–4TB 2.5" or 3.5")
- External USB drive for backups ($40–$60 for 4TB)
Software: Operating System
You'll install Linux. Don't be scared — you interact with it via a web browser 90% of the time.
Recommended: Ubuntu Server 24.04 LTS
Why Ubuntu:
- Most documentation uses Ubuntu commands
- 5-year LTS support (stable, no frequent upgrades needed)
- Massive community — every problem is already answered online
- Works on all x86 hardware
Alternatives:
- Debian 12 — Slightly more conservative, equally stable
- TrueNAS SCALE — If storage/NAS is your primary goal
- Proxmox — If you want to run multiple operating systems as VMs (intermediate)
- Raspberry Pi OS — If using a Raspberry Pi
Step 1: Install Ubuntu Server 24.04
Download and Create Boot USB
- Download Ubuntu Server 24.04 LTS from ubuntu.com/download/server
- Download Balena Etcher from balena.io/etcher
- Flash the Ubuntu ISO to a USB drive (8GB+)
Install
- Plug USB into your mini PC/laptop, power on
- Press F12 (Dell) or F2 (most others) for boot menu
- Select USB drive
- Follow the installer:
- Language: English
- Network: Let it auto-configure
- Storage: "Use entire disk" → select your SSD
- Profile setup: Set your username, server name, password
- SSH: ✅ Install OpenSSH Server (critical — enables remote access)
- Snap packages: Skip all, press Done
- Install completes → Remove USB → Reboot
Step 2: Connect via SSH
After reboot, your server shows its IP address on screen:
Ubuntu 24.04 LTS servername tty1

servername login: _
Check the IP in your router's DHCP client list, or read it from the server screen.
From your main computer:
# macOS/Linux terminal
ssh username@192.168.1.100   # Replace with your server's IP

# Windows — use PuTTY or Windows Terminal (built in on Win 11)
# Or install Windows Subsystem for Linux (WSL)
You now control your server from your laptop. You never need a keyboard/mouse attached to the server again.
Set a static IP (important):
Go to your router → DHCP settings → Find your server's MAC address → Assign a permanent IP (e.g., 192.168.1.100). This prevents the IP from changing.
Step 3: Basic Server Setup
# Update everything
sudo apt update && sudo apt upgrade -y

# Install helpful tools
sudo apt install -y curl wget git htop iotop net-tools unattended-upgrades

# Enable automatic security updates
sudo dpkg-reconfigure unattended-upgrades
# Select "Yes" when prompted

# Check your server's IP
ip a

# Check disk space
df -h

# Check RAM usage
free -h
Step 4: Install Docker
Docker is how you'll install almost every service on your home server. Instead of complex installation scripts, you just run a single command and the service appears.
# Install Docker (official method)
curl -fsSL https://get.docker.com | sh

# Add yourself to the docker group (so you don't need sudo)
sudo usermod -aG docker $USER

# Apply group change without logging out
newgrp docker

# Test it works
docker run hello-world
Docker Compose lets you define multiple services in one file:
# Compose is included with modern Docker, verify:
docker compose version
# Should show: Docker Compose version v2.x.x
Step 5: Install Your First Service — Pi-hole
Pi-hole blocks ads and tracking domains across your entire home network. It's the perfect first service: immediately useful, low resources, and teaches you the Docker pattern.
Create your first compose file:
mkdir -p ~/services/pihole
cd ~/services/pihole
nano docker-compose.yml
Paste this:
version: "3"

services:
  pihole:
    image: pihole/pihole:latest
    container_name: pihole
    restart: unless-stopped
    ports:
      - "53:53/tcp"
      - "53:53/udp"
      - "8080:80"
    environment:
      TZ: "America/New_York"
      WEBPASSWORD: "changeme123"
    volumes:
      - ./etc-pihole:/etc/pihole
      - ./etc-dnsmasq.d:/etc/dnsmasq.d
    cap_add:
      - NET_ADMIN
Start it:
docker compose up -d

# Check it's running
docker compose ps

# See logs
docker compose logs pihole
Now open http://192.168.1.100:8080/admin in your browser. You should see the Pi-hole dashboard.
Connect your network to Pi-hole:
- Go to your router settings → DNS server
- Set Primary DNS to your server's IP (192.168.1.100)
- Set Secondary DNS to 8.8.8.8 (backup)
- Save and restart router
All devices on your network now use Pi-hole for DNS. You'll immediately see ad queries being blocked in the dashboard.
Step 6: Add More Services
The pattern is the same for every service:
- Create a directory:
mkdir -p ~/services/servicename - Create
docker-compose.ymlwith the service config docker compose up -d- Access via web browser
Quick-start compose files:
Uptime Kuma (monitor your services):
services:
  uptime-kuma:
    image: louislam/uptime-kuma:1
    container_name: uptime-kuma
    restart: unless-stopped
    ports:
      - "3001:3001"
    volumes:
      - ./data:/app/data
Vaultwarden (password manager):
services:
  vaultwarden:
    image: vaultwarden/server:latest
    container_name: vaultwarden
    restart: unless-stopped
    ports:
      - "8180:80"
    environment:
      SIGNUPS_ALLOWED: "false"
    volumes:
      - ./data:/data
Jellyfin (media server):
services:
  jellyfin:
    image: jellyfin/jellyfin:latest
    container_name: jellyfin
    restart: unless-stopped
    ports:
      - "8096:8096"
    volumes:
      - ./config:/config
      - ./cache:/cache
      - /mnt/media:/media:ro
    devices:
      - /dev/dri:/dev/dri   # Intel GPU for hardware transcoding
Essential Docker Commands
# Start all services in current directory
docker compose up -d

# Stop all services
docker compose down

# See running containers
docker ps

# See all containers (including stopped)
docker ps -a

# Follow logs for a container
docker logs -f container_name

# Restart a container
docker restart container_name

# Update a container to latest version
docker compose pull && docker compose up -d

# Remove stopped containers + unused images (cleanup)
docker system prune -f
Accessing Services from Outside Your Home
Your services are only accessible on your local network by default. To access them remotely:
Option 1: Tailscale (Easiest — Recommended for Beginners)
Tailscale creates a private encrypted network between your devices. No port forwarding, no public IP exposure.
# Install on server
curl -fsSL https://tailscale.com/install.sh | sh
sudo tailscale up

# Install Tailscale app on phone/laptop
# Both devices join your Tailscale network
# Access server via its Tailscale IP from anywhere
Option 2: VPN (WireGuard)
Install WireGuard on your server and clients. More setup but full control.
Option 3: Cloudflare Tunnel
Cloudflare proxies traffic to your server without exposing your home IP. Good for sharing services with others.
Do NOT just forward ports from your router to every service — this exposes them to the internet without authentication.
Backup: The Most Important Step
A server without backups is an accident waiting to happen.
3-2-1 Backup Rule:
- 3 copies of data
- 2 different storage media
- 1 offsite/remote copy
Simple backup script:
#!/bin/bash
# Run nightly via cron: 0 2 * * * /home/user/backup.sh
BACKUP_DEST="/mnt/backup"
DATE=$(date +%Y%m%d)

rsync -av --delete ~/services/ "$BACKUP_DEST/services-$DATE/"

# Keep last 7 days
find "$BACKUP_DEST" -maxdepth 1 -name "services-*" -mtime +7 -exec rm -rf {} \;
echo "Backup complete: $(date)"
Add cron job:
crontab -e
# Add line: 0 2 * * * /home/username/backup.sh
Monitoring Your Server
Once you have services running, you want to know if something breaks.
Uptime Kuma (installed above) monitors services and sends alerts via:
- Telegram
- Discord
- Slack
- Pushover (phone notifications)
Set up alerts for any service going down, and you'll know within 1 minute of an outage.
For system metrics (CPU, RAM, disk, temperatures):
- Prometheus + Grafana guide — comprehensive dashboards
- Netdata (simpler alternative):
docker run -d --name=netdata -p 19999:19999 --pid=host --network=host netdata/netdata
Common Beginner Mistakes to Avoid
1. Not setting a static IP Services become inaccessible when the DHCP lease expires and the IP changes. Set a static assignment in your router for the server's MAC address.
2. Storing data inside containers
Always use volume mounts (./data:/container/path). Data inside a container disappears when you recreate it.
3. Running as root
Don't sudo docker everything. Add yourself to the docker group (step 4) and run as your normal user.
4. No backups before experiments Before trying something new (new service, config change), back up your compose files and data directories.
5. Forgetting to set restart policies
Always include restart: unless-stopped in your compose files. Otherwise, services don't come back after a server reboot.
6. No UPS (Uninterruptible Power Supply) A sudden power outage can corrupt databases. A cheap UPS ($30–$60) gives you 10–20 minutes to gracefully shut down.
Recommended Learning Path
Week 1:
- ✅ Install Ubuntu Server
- ✅ Connect via SSH
- ✅ Install Docker
- ✅ Run Pi-hole
- ✅ Run Uptime Kuma
Week 2:
- Install Vaultwarden (password manager)
- Set up Tailscale for remote access
- Configure Uptime Kuma alerts
Week 3:
- Install Jellyfin or Nextcloud (depending on your priorities)
- Set up automated backups
- Read about Docker networking
Month 2:
- Explore Portainer for visual container management
- Set up Grafana + Prometheus for system monitoring
- Try more services as needed
Frequently Asked Questions
Q: Do I need to know Linux to run a home server?
You need to know very basic Linux commands (listed in this guide). You'll use the terminal to SSH in and run Docker commands, but most services are managed through web UIs. If you can follow a tutorial, you can run a home server. The learning curve is steepest in the first week, then flattens dramatically.
Q: How long does it take to set up a home server?
Installing Ubuntu + Docker + Pi-hole takes 2–3 hours including hardware setup. Each additional service is 5–20 minutes. A full stack (Jellyfin, Nextcloud, Home Assistant, Vaultwarden) realistically takes a weekend.
Q: Is it safe? Can I get hacked?
Your local services are not accessible from the internet unless you explicitly expose them. The default Docker configuration is local-only. Use Tailscale for remote access instead of port-forwarding, use strong passwords, and keep software updated (Watchtower automates this), and you'll be far more secure than most cloud services.
Q: What if something breaks?
Things will break occasionally. This is normal and part of the learning experience. Most issues have documented solutions on Reddit (r/selfhosted, r/homelab) or GitHub. Docker makes recovery easy: delete the container, fix the config, and restart. Your data survives in the mounted volumes.
Q: Do I need a domain name?
No. You can access everything via local IP address and port. A domain with SSL makes it more convenient (especially for mobile apps that require HTTPS), but it's not required to start.
Next Steps
Once you're comfortable with the basics:
You may also like

Hardware
Best Home Server for Beginners 2026: Complete Starter Guide
New to home servers? Start here. Compare hardware options, discover 8 popular use cases, and learn how to run 10 self-hosted services on an Intel N100 mini PC for just $10/year in electricity.
beginnersgetting-startedlow-power
Builds
N100 Home Server Docker Stack: Run 10 Services Under 15W (2026)
Complete docker-compose.yml to run Jellyfin, Nextcloud, Home Assistant, Pi-hole, Vaultwarden, Immich, Homepage, Uptime Kuma, Tailscale, and Portainer on an Intel N100 mini PC under 15W.
docker-composehome-assistantlow-power

Use Cases
What Can a Home Server Do? 15 Practical Uses in 2026
From replacing Netflix to running local AI, a home server running on 8W can do far more than you'd expect. Here are 15 real uses with app recommendations — and the cost breakdown that makes it worth it.
beginnershome-assistantimmich
Related Tools
Ready to calculate your power costs?
Use our Power Calculator to estimate how much your server will cost to run 24/7.
Try Power Calculator